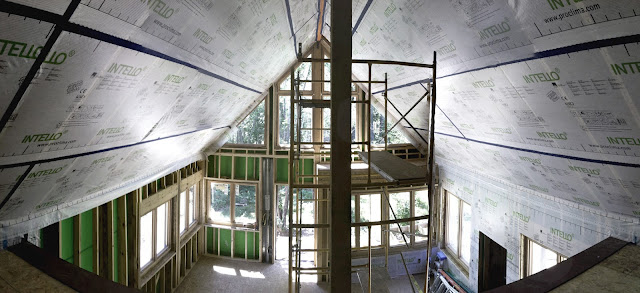
Now that the whole house is nicely wrapped in our Intello air-barrier, we have to deal with all the funny spots where we need to (for one reason or another ) break through that barrier. That would mean things like windows and doors, electrical outlets, plumbing and ventilation lines and all the other things that move around inside of our walls.
This is the part of air-sealing that takes the most attention and care and usually a fair bit of on-site imagineering, no matter how much planning you do.
Windows:
Windows are, of course, one of the biggest trouble spots for air-sealing. After all - it's the spot where you put a big, operable, transarent hole in your nice, thick, tight wall. While we don't have too much control over the window-unit itself (other than staying away from things like double-hung windows) - we can do a lot to make sure that our air-membrane is sealed well to the frame.
Below you can see our original detail for the air-sealing. We were going to run small strips of Intello around the window and tape to the wood frame then cover it in rigid foam insulation and finish it off by adding all the interior trim and wall covering.
 |
| Window Sill detail - Interior |
In the final detail we decided to install the rigid foam first, then installing the air-barrier. Because of the amount of rigid foam, we were concerned about water (from condensation) getting trapped under it and unable to dry out. So, like everything else, we encase it behind our air and vapor barrier, that way no humid indoor air can worm its way behind it and cause problems. The operation is actually very straightforward, it just requires the right tapes and a fair bit of attention and patience.
 |
| As-Built window sill detail: Layers pulled back for clarity |
Our first step, shown below, is to install the rigid insulation and then apply the strips of Intello. These are then taped to the window frame with Pro-Clima's Profil tape.
This tape (below) is super cool - its another fabric tape, but has a nice split release back to make doing these inside corners much easier.
 |
| Tescon Profil Fabric Ai-Seal Tape |
The first edge is applied to the window, then the second piece of release paper is removed, allowing us to seal to the Intello.
The 3-way corner where the bottom and side meet is taped with a pre-made corner. 475 has a great little tutorial on making these and they ensure that we have a totally continuous seal all the way around.
Once the window frame is taped, all the overlapping Intello membrane seams are taped, forming a tight seal. Once the trim goes on the windows, it'll cover all the tape you see here and no one will ever know about all layers going on behind.
Outlets and Electrical:
For electrical outlets and switches, there are a lot of techniques to air-seal. Some choose to seal the back of regular boxes with mastic or foam and seal around all the wires. Other assemblies apply another layer to the interior of the wall that is thick enough to run all the wires and boxes in, inboard of the air barrier. This technique (the 'service core') is how we built out the Solar Decathlon house last summer. This time around since we had, by design, consolidated all the plumbing away from the exterior walls and limited the amount of outlets in the exterior wall (by placing them in built-in furniture esp) we decided to try a special outlet box made for air-sealing. Above you can see the final sealed box - these boxes have a wide flange around the outside which makes taping really simple. In addition, you can see slots at the top and bottom - these are designed to be filled with spray foam once installation is complete and form a nice seal around the wires themselves without any mess. Really cool product and there are similar versions for all the typical electrical uses (switches, 4x's, etc)
For wires that will run to boxes which aren't mounted in the exterior wall (above) we use a special gasket made by Pro Clima - these have an adhesive patch which seals tightly to the air-barrier, and a tight EPDM rubber gasket that the wire penetrates through. This forms a tight, but flexible air-seal around all the wires.
Plumbing and HVAC:
Plumbing and HVAC penetrations are similar - we bought gaskets sized accurately to the pipe or duct diameter. These large EPDM gaskets are then taped to the air-barrier. Below you can see the HRV in our loft mechanical space with the intake and exhaust lines. These insulated ducts have to go all the way to the exterior of the house and so have tight gaskets to seal them off.
 |
| Loft Mech-room with HRV and Zhender insulated Ducts |
 |
| Intake Duct penetrating the envelope to the exterior |
Same thing with plumbing - below is a waste line in the basement penetrating the crawl-space wall. All this just takes a bit of planning ahead to make sure you have the right gaskets on-site when its time to run the lines. This is important as these can't really be applied after wards and so all the sub's need to understand exactly what the plan is ahead of time.
 |
| Plumbing penetration in the basement |
Everything on the first floor is just about sealed up at this point. We still need to do all the big gable-end windows and once that is complete we'll be ready to test our house and see how well we did on all this sealing.


